
Understanding HVAC Duct Installation: The Home's Air Highway
HVAC duct installation is the process of designing and building the network of tubes that deliver heated or cooled air throughout your home. For homeowners looking to understand the basic steps of duct installation, here's a quick overview:
Basic HVAC Duct Installation Process:
- Planning & Design: Calculate airflow needs and create a duct layout
- Material Selection: Choose between sheet metal, flex duct, or fiberglass ductwork
- Installation Steps:
- Mount the air handler/furnace
- Install the supply plenum
- Run main trunk lines
- Connect branch ducts to rooms
- Install return air system
- Seal all joints and connections
- Insulate ducts in unconditioned spaces
- Testing: Balance airflow and check for leaks
Properly installed ductwork is crucial for your home's comfort and energy efficiency. Like the circulatory system in your body, these air highways distribute conditioned air to every room while returning stale air to be refreshed. When designed and installed correctly, your ducts ensure consistent temperatures throughout your home while minimizing energy waste.
According to industry data, improperly installed ductwork can result in energy losses of up to 30% due to leaks, poor connections, and inadequate insulation. This translates directly to higher utility bills and uncomfortable living spaces with hot and cold spots.
I'm Bill Scott, general manager at Smart Climate Solutions with over 15 years of experience overseeing hundreds of HVAC duct installation projects throughout Pittsburgh and Southwestern Pennsylvania. My team has refined our installation techniques to ensure maximum efficiency and comfort for every home we service.

What You'll Learn
In this comprehensive guide, we'll walk you through everything you need to know about HVAC duct installation, whether you're considering a DIY approach or want to understand what professional installation entails. We'll cover:
- The essential components of ductwork systems and how air flows through them
- How to choose the right materials and properly size ducts for your home
- A step-by-step installation process with best practices
- Common mistakes to avoid during installation
- Cost considerations and when to call the professionals
- Maintenance tips to keep your system running efficiently
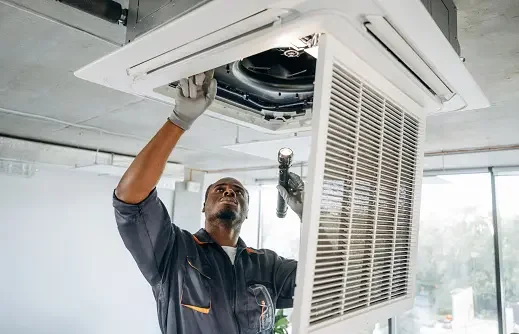
Before diving into any duct installation project, you'll need proper safety equipment including leather gloves (sheet metal edges are razor-sharp), safety glasses, a dust mask, and sturdy footwear. If working in an attic or crawlspace, you'll also need adequate lighting and potentially knee pads or a work platform.
As one of our veteran technicians likes to say, "Sheet metal can be as sharp as a razor blade. One wrong move, and you're off to get stitches... NOT FUN!" Safety first, always.
HVAC Duct Installation 101: Components & Airflow
Think of your home's ductwork as the lungs of your living space. To truly understand HVAC duct installation, we need to explore how this breathing system works together to keep you comfortable year-round.

When I walk clients through their first duct installation, I often compare it to a tree. Your air handler is the trunk, the main ducts are the branches, and those small vents in each room are the leaves where comfort finally reaches you.
Every forced-air system starts with the air handler (your furnace or heat pump) that conditions the air. Connected to it is the supply plenum – a large metal box that collects the newly conditioned air before sending it on its journey. From there, main trunk lines (usually rectangular sheet-metal ducts) carry air throughout your home, with smaller branch ducts (often flexible) connecting to individual rooms. The air exits through supply registers in your rooms, circulates around you, and then returns through return grilles to begin the cycle again.
Industry standards are critical here. The Sheet Metal and Air Conditioning Contractors' National Association (SMACNA) provides detailed specifications for every component, while the Air Conditioning Contractors of America offers Manual D – the bible of residential duct design. Following these guidelines isn't just good practice; it's essential for a system that actually works.
Why Ductwork Matters for Comfort & Bills
"I thought my HVAC unit was faulty, but it turned out my ducts were the real problem," shared Janet from Bethel Park after we redesigned her system. Her story isn't unique.
Properly installed ductwork is the unsung hero of home comfort. When ducts are correctly sized and sealed, you'll enjoy consistent temperatures throughout your home – no more freezing bedrooms while the living room feels like a sauna. But the benefits go beyond comfort.
Did you know that poorly installed ductwork can leak up to 30% of your conditioned air? That's not just uncomfortable – it's like throwing money directly into your attic or crawlspace. These leaks force your system to work overtime, shortening its lifespan and inflating your energy bills.
Think of ductwork as a pressure system. When air pressure isn't balanced properly, some rooms get too much air while others get too little. This imbalance creates those frustrating hot and cold spots that no amount of thermostat adjustment seems to fix.
Main Components At a Glance
Let me walk you through the key players in your duct system that we handle during installation:
Ducts are the pathways themselves – the highways that carry your conditioned air. They come in various materials, from rigid sheet metal to flexible polyester.
The plenum is like Grand Central Station for your air. This large box connects directly to your air handler and serves as the distribution point for all outgoing air.
Transitions are the creative connectors that help ducts change direction, size, or shape. These include take-offs (where branch ducts connect to the main trunk), turning vanes (which help air make smooth turns), and boots (which connect the duct to your floor or ceiling register).
Registers and grilles are the visible parts of your system in each room. Registers have adjustable dampers for controlling airflow, while grilles are fixed openings.
Dampers act like traffic cops inside your ducts, controlling how much air flows to different areas of your home. They're essential for balancing your system.
As one of our technicians likes to say, "Your fancy new furnace is only as good as the ducts it's connected to." At Smart Climate Solutions, we've seen $10,000 heating systems perform terribly because of $2,000 worth of poorly installed ductwork.
How Air Moves Through the System
Understanding airflow helps you appreciate the importance of proper HVAC duct installation. The journey begins when your blower fan pulls room air into return grilles. This air travels through return ducts back to your system where it's filtered and conditioned.
Once heated or cooled, the air is pressurized by the blower and pushed into the supply plenum. From there, it travels through the supply path – main trunks first, then branch ducts, and finally out through supply registers into your rooms.
This creates a continuous loop of air movement. Your home actually develops different pressure zones during this process – slightly positive pressure in rooms with supply vents and slightly negative pressure in areas with returns.
Our veteran technician in Steubenville, often tells clients: "If your ductwork is the highway system, think of static pressure as the traffic. Too much congestion (high static pressure) means your blower works harder and moves less air. Too little restriction means air rushes through without properly distributing."
A properly balanced system creates the perfect pressure relationship, ensuring every room receives the right amount of conditioned air while maintaining energy efficiency. When we install ductwork at Smart Climate Solutions, we're not just connecting metal tubes – we're engineering your home's comfort ecosystem.
Choosing & Sizing Ductwork: Materials, Codes, Calculations
Picking the right materials and correctly sizing your ductwork isn't just about checking boxes—it's about creating the foundation for your home's comfort for years to come. As we often tell our Pittsburgh customers, your duct choices today will affect your comfort (and wallet) for decades.

Material Showdown
When it comes to HVAC duct installation, you've got several materials to choose from, each with its own personality:
Galvanized steel is the ironman of ductwork—tough, long-lasting (30-50 years), and completely fire-resistant. It won't grow mold and you can clean it thoroughly when needed. The downside? It's the priciest option at $11.94-$34.72 per linear foot and requires specialized tools to work with.
Fiberglass duct board comes with built-in insulation and keeps things quieter than metal. You can cut and shape it on-site, which is handy, but it can't be cleaned as effectively as metal. Expect to pay $7.21-$30.49 per linear foot for uninsulated, and $7.09-$36.25 for insulated versions.
Fiberboard is the budget-friendly cousin that's easy to work with, but it comes with compromises—shorter lifespan, rougher interior that restricts airflow, and potential mold issues in humid areas.
Flexible ducts are the gymnasts of the bunch—bendy, adaptable, and perfect for navigating around obstacles. They're easier on your wallet and your installation time, but they create more air resistance and typically last only 10-15 years.
"For homes around Pittsburgh and Western PA," says our installation supervisor, "we typically recommend galvanized steel for main trunks with properly supported flex duct for branches. Our freeze-thaw cycles and humidity levels make this combination ideal for longevity and performance."
Right-Size Rules
Getting your duct sizing right is like Goldilocks finding the perfect porridge—not too big, not too small, but just right. This is where many DIY projects stumble, but here's how we approach it:
Everything starts with a Manual J Load Calculation—a comprehensive analysis of your home's specific heating and cooling needs. We look at your square footage, ceiling heights, insulation values, windows, home orientation, and even local climate patterns.
From there, we move to Manual D Duct Design, which converts those heating/cooling requirements into specific duct dimensions. We calculate the total system CFM (cubic feet per minute), friction rate, the effective length of each duct run, and the proper size for every branch.
The relationship between your main trunk lines and smaller branches matters tremendously. We maintain a trunk-to-branch ratio that ideally stays between 2:1 and 3:1, never exceeding 4:1.
As our veteran technician Lee likes to explain to homeowners: "Undersized ducts are like trying to drink a thick milkshake through a coffee stirrer instead of a proper straw. Your HVAC system will strain, struggle, and eventually wear out prematurely."
Code & Regulation Essentials
Nobody loves talking about building codes, but they exist for good reasons—safety, efficiency, and consistency. For HVAC duct installation, regulations vary by location, but here are the essentials:
The International Energy Conservation Code (IECC) provides the backbone that most state codes build upon, especially regarding insulation requirements and sealing standards. Meanwhile, commercial projects typically reference ANSI/ASHRAE/IES Standard 90.1-2019—the gold standard for energy efficiency that states must certify compliance with by July 28, 2023.
Your local building department will have specific requirements that might go beyond these standards. In Pittsburgh, for instance, any new ductwork installation requires both a permit and inspection before walls get closed up.
Insulation is particularly important—ducts running through unconditioned spaces like attics, crawlspaces, or garages typically need a minimum R-8 insulation value to prevent energy loss and condensation problems.
"The number one reason we see DIY installations fail inspection in Weirton and surrounding areas," notes our permit coordinator Sarah, "is inadequate sealing at joints, followed closely by improper support spacing. These might seem like small details, but they make a huge difference in system performance and energy bills."
Whether you're planning a DIY project or evaluating professional installation options, understanding these material choices, sizing principles, and code requirements gives you the foundation for making informed decisions about your home's comfort system.
How to Execute an HVAC Duct Installation Step-by-Step
Now that you understand the components, materials, and sizing requirements, let's walk through the actual HVAC duct installation process. This is where theory meets practice, and attention to detail becomes crucial.
Pre-Work Planning & Tools
Before starting any installation, proper preparation is essential:
Required Tools:
- Tape measure
- Metal snips (right, left, and straight)
- Drill with ¼" hex driver
- Hand seamers
- Bar fold tool (for bending metal)
- Screwdrivers and nut drivers
- Mastic sealant and brush
- HVAC foil tape (not standard duct tape)
- Insulation and staple gun
- Leather gloves and safety glasses
- Dust mask
Planning Steps:
- Create a detailed, scaled drawing of your duct layout
- Mark all register locations on floors, walls, or ceilings
- Identify the path for return air
- Locate and mark joist positions to plan for duct routing
- Calculate duct lengths and make a materials list
- Check for any obstructions that might interfere with your planned routes
"A good plan is 80% of a successful installation," says our project manager in Burgettstown, PA. "We spend more time planning than many competitors spend on the entire job."
HVAC Duct Installation Step-by-Step Checklist
Follow this sequence for a professional HVAC duct installation:
Install the Air Handler/Furnace
- Position on a level surface according to manufacturer specifications
- Allow proper clearances for service access
- Connect electrical and gas/refrigerant lines (professional services recommended)
Fabricate and Install the Supply Plenum
- Cut and assemble sheet metal to create the plenum box
- The plenum should typically end about 1" below the ceiling
- Attach to the air handler's supply outlet
- Mark and cut take-off locations for trunk lines
Install Main Trunk Lines
- For sheet metal ducts:
- Assemble using S-cleats for long edges
- Use drive cleats for side locks
- Support every 4-6 feet with hangers
- For fibrous ducts:
- Cut with a utility knife
- Assemble according to manufacturer instructions
- Support adequately to prevent sagging
- For sheet metal ducts:
Add Branch Ducts
- Install take-offs on the main trunk
- For metal branches:
- Cut to length
- Connect using appropriate fittings
- Support properly
- For flex duct:
- Stretch to full length (do not compress)
- Cut to proper length
- Connect to take-offs and boots with zip ties and seal
- Support every 4 feet to prevent sagging
Install Supply Registers
- Cut openings in floors, walls, or ceilings
- Position registers between joists, not over them
- Cut holes ¼" oversized for easier register placement
- Install register boots and connect to branch ducts
- Secure registers in place
Create Return Air System
- Install return air grilles
- Connect return duct to the air handler
- Ensure return air capacity matches supply air volume
- In finished spaces, consider using wall cavities or joist spaces as return pathways
Seal All Connections
- Apply mastic sealant or metal-backed tape to all joints
- Pay special attention to plenum connections, take-offs, and register boots
- Never use standard cloth duct tape, which deteriorates quickly
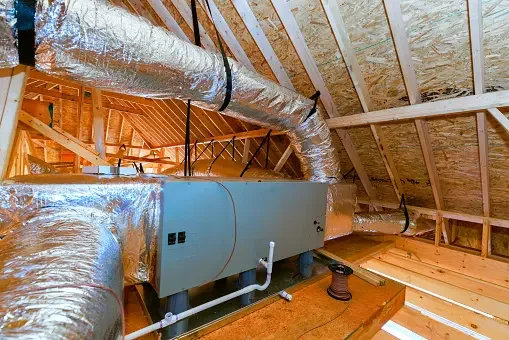
Insulate Ducts in Unconditioned Spaces
- Wrap ducts with insulation meeting local code requirements (typically R-8)
- Secure insulation with outward-facing tape
- Ensure all seams in insulation are sealed
As our lead installer with 15 years of experience notes: "The difference between a good installation and a great one is in the details—particularly how well you seal and support the system."
Best Practices for Sealing, Insulating & Supporting
These critical steps often determine the long-term performance of your HVAC duct installation:
Sealing Best Practices:
- Use UL-181 rated mastic sealant or metal-backed tape (never standard duct tape)
- Seal all joints, seams, and connections
- Pay special attention to areas where different materials meet
- Apply three screws per joint before sealing for mechanical strength
- For flex duct, use approved zip ties with mechanical fasteners before sealing
Insulation Guidelines:
- In unconditioned spaces, use a minimum of R-8 insulation
- In semi-conditioned spaces, use at least R-6 insulation
- Ensure insulation covers all metal surfaces to prevent condensation
- Seal all insulation seams with appropriate tape
- Keep insulation dry during and after installation
Support Requirements:
- Support sheet metal ducts every 4-6 feet
- Support flex ducts every 4 feet maximum
- Use proper hanging straps designed for ductwork
- Never compress insulation with supports
- Maintain proper clearance from hot surfaces (e.g., flues)
"In northern West Virginia homes, we've seen improperly insulated ducts in attics lead to condensation issues and even ceiling damage," explains our service manager. "Proper insulation isn't just about energy efficiency—it's about protecting your home."
Common HVAC Duct Installation Mistakes
Avoid these frequent errors that we see in DIY and some professional HVAC duct installation projects:
Kinked or Compressed Flex Ducts
- Reduces airflow by up to 60%
- Creates noise issues
- Fix: Stretch flex duct fully before cutting and ensure gentle bends
Sharp 90-Degree Turns
- Creates turbulence and reduces airflow
- Increases system noise
- Fix: Use proper radius elbows or turning vanes; avoid cap-and-tap fittings
Undersized Ducts
- Forces system to work harder
- Creates air balance issues
- Fix: Follow Manual D calculations; when in doubt, go larger
Insufficient Return Air
- Creates negative pressure issues
- Reduces system efficiency
- Fix: Ensure return air capacity matches supply; install multiple returns for multi-level homes
Poorly Sealed Connections
- Wastes energy and reduces comfort
- Can introduce contaminants
- Fix: Use proper mastic or metal tape on all connections
Unsupported Duct Runs
- Causes sagging and airflow restrictions
- Creates noise from movement
- Fix: Support properly at required intervals
Inadequate Insulation
- Wastes energy
- Creates condensation issues
- Fix: Use proper R-value insulation for your climate zone
"We recently serviced a home in Southwestern PA where the previous installer had used 30-gauge sheet metal—too thin for residential ducts," shares our technical director. "The result was constant banging and tin-canning noises whenever the system cycled on. We had to replace the entire trunk line."
Costs, DIY vs Professional Help & Avoiding Budget Blowouts
Understanding what you'll spend on an HVAC duct installation project helps you make smarter decisions about tackling it yourself or bringing in the experts. Let's break down the dollars and sense of ductwork installation.

What Influences Price?
The national average for installing HVAC ductwork typically runs between $10 and $25 per square foot, with most homeowners spending between $1,400 and $5,600 total. But what makes that number jump up or down?
Your home's size plays a major role in the final bill. A cozy 1,000-2,500 square foot home might need around 150 linear feet of ductwork, costing between $1,500-$3,000. Move up to a 3,000-4,500 square foot home, and you're looking at roughly 350 linear feet, which could run $3,500-$7,000.
Material choices create significant price swings too. Sheet metal is typically the most expensive at $11.94-$34.72 per linear foot, while fiberglass runs $7.21-$30.49 per linear foot uninsulated. Flexible ducts generally offer the most budget-friendly option for most homeowners.
Then there's the labor factor. HVAC technicians typically charge between $18.93 and $35.23 per hour, with labor making up about 60% of your total project cost. Most installations take a professional team 2-3 days of 8-10 hour workdays to complete.
"Here in southeast Ohio, we typically see full-home installations averaging around $4,800 for a 2,000 square foot home," explains our estimator. "But I've seen that number change dramatically based on whether we're working in a spacious attic or a cramped crawlspace with barely enough room to turn a screwdriver."
Accessibility can make or break your budget. Retrofitting existing homes typically costs 50-100% more than new construction installations because technicians have to work around finished walls, floors, and ceilings. And don't forget about permits and inspections, which can add $250-$1,500 depending on your local requirements.
If you own an older home, factor in potential testing and remediation costs. Homes built before the 1980s might contain asbestos materials that require professional testing and special handling.
DIY Risks vs Rewards
The temptation to DIY your HVAC duct installation is understandable. The potential labor savings of $1,000-$3,000 is nothing to sneeze at. Plus, there's the satisfaction of completing a major home project yourself.
But before you grab those tin snips, consider what you're getting into. Professional ductwork installation requires specialized tools that most homeowners don't have lying around—metal snips, seamers, crimpers, and more. You'll need to factor in these purchases when calculating your potential savings.
The technical knowledge barrier is substantial too. As Tom, one of our veteran technicians puts it: "Proper duct sizing isn't something you can eyeball. It requires understanding static pressure, friction rates, and airflow calculations. Get it wrong, and you'll be uncomfortable and wasting energy for years."
The physical demands shouldn't be underestimated either. You'll be wrestling with unwieldy sheets of metal with razor-sharp edges, often while balancing on joists in a dusty attic or crawling through tight spaces.
"I thought I'd save money by installing my own ducts," shared Mike, a Pittsburgh homeowner who called us after his DIY attempt. "But after three weekends of frustration and still not being done, I called Smart Climate Solutions. They finished in two days what would have taken me another month, and did it better than I could have."
Permit and inspection fees still apply whether you DIY or hire pros. And if your installation doesn't pass inspection, you'll be paying twice—once for your attempt and again for a professional to fix it. Many equipment manufacturers also void warranties if their systems aren't professionally installed, potentially costing you thousands down the road if something fails.

When to Call Certified Pros
Some HVAC duct installation scenarios practically demand professional expertise. If any of these situations sound familiar, it's probably time to call the pros:
Technical complexity is a major consideration. Whole-home installations, systems requiring zoning for different temperatures in different areas, or homes with unusual layouts typically benefit from professional design and installation. Professional load calculations ensure your system is perfectly sized for your specific home—not too big (wasting energy) or too small (leaving you uncomfortable).
Regulatory requirements often necessitate professional installation. Many jurisdictions require permits for ductwork installation, and those permits may require certified professionals to do the work. If you're hoping to qualify for energy-efficiency rebates or incentives, these programs typically require professional installation with proper documentation.
Special circumstances like older homes that might contain asbestos materials absolutely require professional assessment. Multi-story installations present unique challenges for proper airflow and balance. And installations involving gas furnaces should always be handled by professionals for safety reasons.
At Smart Climate Solutions, our certified technicians bring over two decades of specialized knowledge to every installation throughout Western Pennsylvania. We've seen how proper installation makes all the difference in comfort, efficiency, and system longevity.
As Sarah from our Monroeville office often tells customers, "Professional installation isn't just about getting air from point A to point B—it's about creating a balanced, efficient system that will keep your family comfortable for years while minimizing your energy bills." That's an investment worth making.
Post-Installation Care: Maintenance, Troubleshooting & Upgrades
After completing your HVAC duct installation, proper maintenance ensures optimal performance and longevity.
Signs of Failing Ductwork
Even the best installation will eventually show wear. Watch for these indicators that your ductwork may need attention:
Comfort Issues:
- Rooms that are consistently too hot or too cold
- Noticeable temperature differences between floors
- Longer heating or cooling cycles
Performance Problems:
- Whistling, rattling, or banging noises when the system runs
- Visible dust around supply registers
- Weak airflow from vents
Efficiency Concerns:
- Unexplained increases in energy bills
- System running more frequently than normal
- Excessive humidity issues
Visual Indicators:
- Visible damage to exposed ductwork
- Disconnected joints or sections
- Condensation on ducts or nearby surfaces
- Rust or corrosion on metal components
Our service technician in St. Clairsville recalls, "We had a customer whose energy bills suddenly increased by 40%. When we inspected their attic, we found that a section of ductwork had completely separated, dumping all their conditioned air into the attic space. A simple repair saved them hundreds of dollars monthly."
Routine Maintenance Checklist
Implement these maintenance practices to extend the life of your HVAC duct installation:
Monthly Tasks:
- Change or clean air filters
- Check visible ductwork for damage
- Listen for unusual noises during operation
Seasonal Tasks:
- Clean supply and return registers
- Check insulation on accessible ducts
- Inspect for signs of moisture or mold
Annual Professional Maintenance:
- Duct inspection for leaks and damage
- System airflow testing and balancing
- Cleaning of blower and components
- Assessment of duct insulation integrity
"Preventative maintenance is always cheaper than emergency repairs," explains our maintenance coordinator. "For our customers in northern West Virginia, we recommend a full system inspection before each heating and cooling season."
When to Repair, Reseal or Replace
Knowing when to repair versus replace your ductwork saves time and money:
When to Repair:
- Minor disconnections at joints
- Small punctures or tears
- Damaged insulation in limited areas
- Localized sagging or support issues
When to Reseal:
- When energy bills are climbing despite a functioning system
- When dust is increasing throughout the home
- Every 10-15 years as part of regular maintenance
- After any renovation work near ductwork
When to Replace:
- Ductwork older than 20-25 years
- Extensive rust or corrosion
- Major rodent or pest infestations
- After significant water damage or mold growth
- When upgrading to a substantially different HVAC system
- During major renovations that affect duct routing
"During a home renovation in Washington, PA, we found ductwork from the 1960s that was severely undersized for the modern high-efficiency system the homeowner had installed," shares our renovation specialist. "Replacing the old ducts increased the system's efficiency by nearly 35% and dramatically improved comfort throughout the home."
For homes with aging ductwork or persistent issues, Smart Climate Solutions offers comprehensive HVAC Service and Repair to address any concerns and restore optimal performance.
Frequently Asked Questions about HVAC Duct Installation
What building permits do I need?
When it comes to HVAC duct installation, navigating the permit process can feel like solving a puzzle. I've walked hundreds of homeowners through this process over the years, and the requirements do vary quite a bit depending on where you live.
Throughout Pittsburgh and Southwestern PA, most cities and townships require permits for new installations and any significant modifications to existing ductwork. These permits typically cost anywhere from $250 to $1,500, with the price tag usually reflecting the scope and complexity of your project.
Most building departments will ask you to submit plans showing your proposed duct layout before they'll issue a permit. And once work begins, you can expect at least two inspections—one during the rough-in stage when the ducts are visible but before any walls are closed up, and another after everything is complete.
"The biggest mistake I see homeowners make is assuming they can skip the permit process," says our permit coordinator who handles applications across three states. "Then they're shocked when they try to sell their home and the inspector flags the unpermitted work. It's always better to do things by the book from the start."
At Smart Climate Solutions, we handle all the permitting paperwork for our customers throughout Western Pennsylvania, southeastern Ohio, and northern West Virginia, saving them the headache of navigating local bureaucracy.
How long does a typical install take?
Time is always a top concern when planning an HVAC duct installation. Nobody wants their home turned upside down for weeks on end!
For new construction projects, our crews can typically complete a small to medium home (up to 2,000 square feet) in just 1-2 days. Larger homes between 2,000-4,000 square feet usually take 2-3 days, while custom or particularly complex installations might stretch to 5 days.
Retrofit projects—where we're replacing or installing ductwork in an existing home—naturally take longer. For a typical 2,000 square foot home, plan on 2-3 days. Larger homes often require 3-5 days, and homes with challenging access points like cramped attics or crawlspaces might need 5-7 days for completion.
Most of our professional installations involve:
- A team of 2-3 skilled technicians working together
- Full 8-10 hour workdays (we bring our lunch and stay until the day's goals are met)
- Additional time for thorough testing and required inspections
As Olivia, our scheduling manager in Steubenville, likes to tell customers: "We always build in a little buffer time when planning your installation. In this business, it's much better to finish early and surprise you than to have to extend beyond our promised completion date."
Can new ducts boost home resale value?
I've had many conversations with homeowners wondering if investing in new HVAC duct installation will pay off when they sell. The short answer is yes—though perhaps not in the way you might expect.
New, properly designed ductwork creates a more energy-efficient home, which is increasingly important to today's buyers. Modern buyers often ask specifically about utility costs and energy efficiency during home tours. Having documentation of your upgraded system can be a significant selling point.
Beyond the energy savings, new ductwork dramatically improves comfort throughout your home. As any real estate agent will tell you, a comfortable showing is essential for making a good impression on potential buyers. No one falls in love with a house where the upstairs bedrooms are stifling hot or the basement feels like an icebox.
"Last year, we helped a family in Shadyside upgrade their ductwork before listing their home," recalls our installation manager. "Their realtor told them that the new HVAC system—especially the properly balanced airflow throughout the house—was mentioned by nearly every interested buyer during showings. They received three offers above asking price within the first weekend."
While you won't recoup 100% of your investment, most homeowners recover between 35-75% of their ductwork costs at resale. Add in the improved comfort and lower energy bills you'll enjoy while still living in the home, and it becomes a worthwhile investment for many families.
The greatest value often comes when new ductwork is part of a complete HVAC system upgrade, which real estate professionals across Pittsburgh tell us can significantly reduce time-on-market for homes in competitive neighborhoods.
Conclusion
After all we've covered about HVAC duct installation, one thing becomes crystal clear – your home's ductwork is the unsung hero of indoor comfort. It's like the circulatory system of your house, quietly doing its job when installed correctly, but causing all sorts of problems when it's not.
At Smart Climate Solutions, we've spent over 15 years crawling through attics, navigating crawlspaces, and designing custom ductwork solutions for homeowners throughout Western Pennsylvania, southeastern Ohio, and northern West Virginia. From Pittsburgh's historic homes to new construction in Weirton, we've seen how proper ductwork transforms living spaces.
"The best compliment we ever get," says our installation team leader, "is when a customer calls to say they finally slept through the night because their bedroom is comfortable for the first time in years."
Quality HVAC duct installation isn't just about comfort – though that's certainly important. It's also about protecting your investment in your home and HVAC equipment. Properly designed and installed ductwork can extend the life of your furnace or air conditioner by years, while saving you real money every month on energy bills.
I remember one customer in Steubenville who was skeptical about replacing her old, leaky ductwork. Six months after we completed the installation, she called just to tell us her winter heating bills had dropped by nearly 30%. The system had nearly paid for itself in the first year!
Whether you're building a new home, renovating an existing one, or simply addressing comfort issues, investing in professional ductwork installation makes sense. While the upfront cost might seem significant, the long-term benefits in energy savings, equipment longevity, and daily comfort make it one of the smartest home investments you can make.
Our team of certified technicians at Smart Climate Solutions is ready to help with your HVAC duct installation needs. We pride ourselves on taking the time to design systems specifically for your home's unique requirements, not just installing one-size-fits-all solutions. Our comprehensive HVAC Installation services are backed by our satisfaction guarantee and round-the-clock support.
Ready to breathe easier with properly designed and installed ductwork? Contact Smart Climate Solutions today for a consultation. Let our two decades of experience work for you, delivering the comfort and efficiency your home deserves for years to come.


.png)
