Why Proper AC Vent Installation Matters for Your Home

AC vent installation is a crucial home improvement task that directly impacts your comfort, energy bills, and HVAC system performance. Whether you're adding a vent to a new room, improving airflow in an existing space, or replacing an old register, understanding the process helps you make informed decisions.
Quick Answer: What You Need to Know About AC Vent Installation
- DIY Installation costs $150-$300 in materials and takes 2-3 hours
- Professional Installation costs $200-$500 depending on complexity
- Basic Steps: Turn off HVAC power, cut openings, connect ductwork, seal joints, install vent cover
- Key Rule: One vent per 100 square feet for rooms, placed at least 12 inches from obstructions
- When to Hire a Pro: For complex ductwork connections, system balancing, or if you're unsure about capacity
Most homeowners can tackle basic vent cover replacement, but adding new vents to existing ductwork requires careful planning. You'll need to consider your HVAC system's capacity, proper vent placement, and airtight connections to avoid performance issues.
The Difference Between Supply and Return Vents
Supply vents push conditioned air into your rooms, while return vents pull air back to your HVAC system for reconditioning. Both are essential for proper air circulation and system balance. Installing a new supply vent without considering return airflow can create humidity problems and reduce efficiency.
I'm Bill Scott, general manager of Smart Climate Solutions, and I've spent over 20 years helping Pittsburgh homeowners with ac vent installation and HVAC system optimization. I've seen how proper vent placement and professional installation can transform uncomfortable rooms into comfortable spaces while reducing energy costs.

Planning Your AC Vent Installation Project
This section covers the critical first steps before you pick up a single tool, ensuring your project is a success from the start. Proper air conditioning vent installation significantly impacts your HVAC system's performance and your home's overall comfort.
Choosing the Right Type of AC Vent
Before we dive into the installation specifics, let's understand the different types of AC vents and their purposes. This is more than just picking a pretty cover; it's about optimizing airflow and comfort.
Essentially, there are two main categories of vents:
- Supply Vents: These are where the conditioned air (cool air in summer, warm air in winter) enters your rooms. They often have adjustable louvers or dampers that allow us to control the direction and amount of airflow. Common types include:
- Floor Registers: Often found along exterior walls, these are effective for heating as warm air rises. In hot climates, they can also deliver cool air directly into the living space.
- Wall Registers: Versatile options that can be placed high or low on a wall. High wall placement is excellent for cooling, as cool air naturally sinks and spreads across the room.
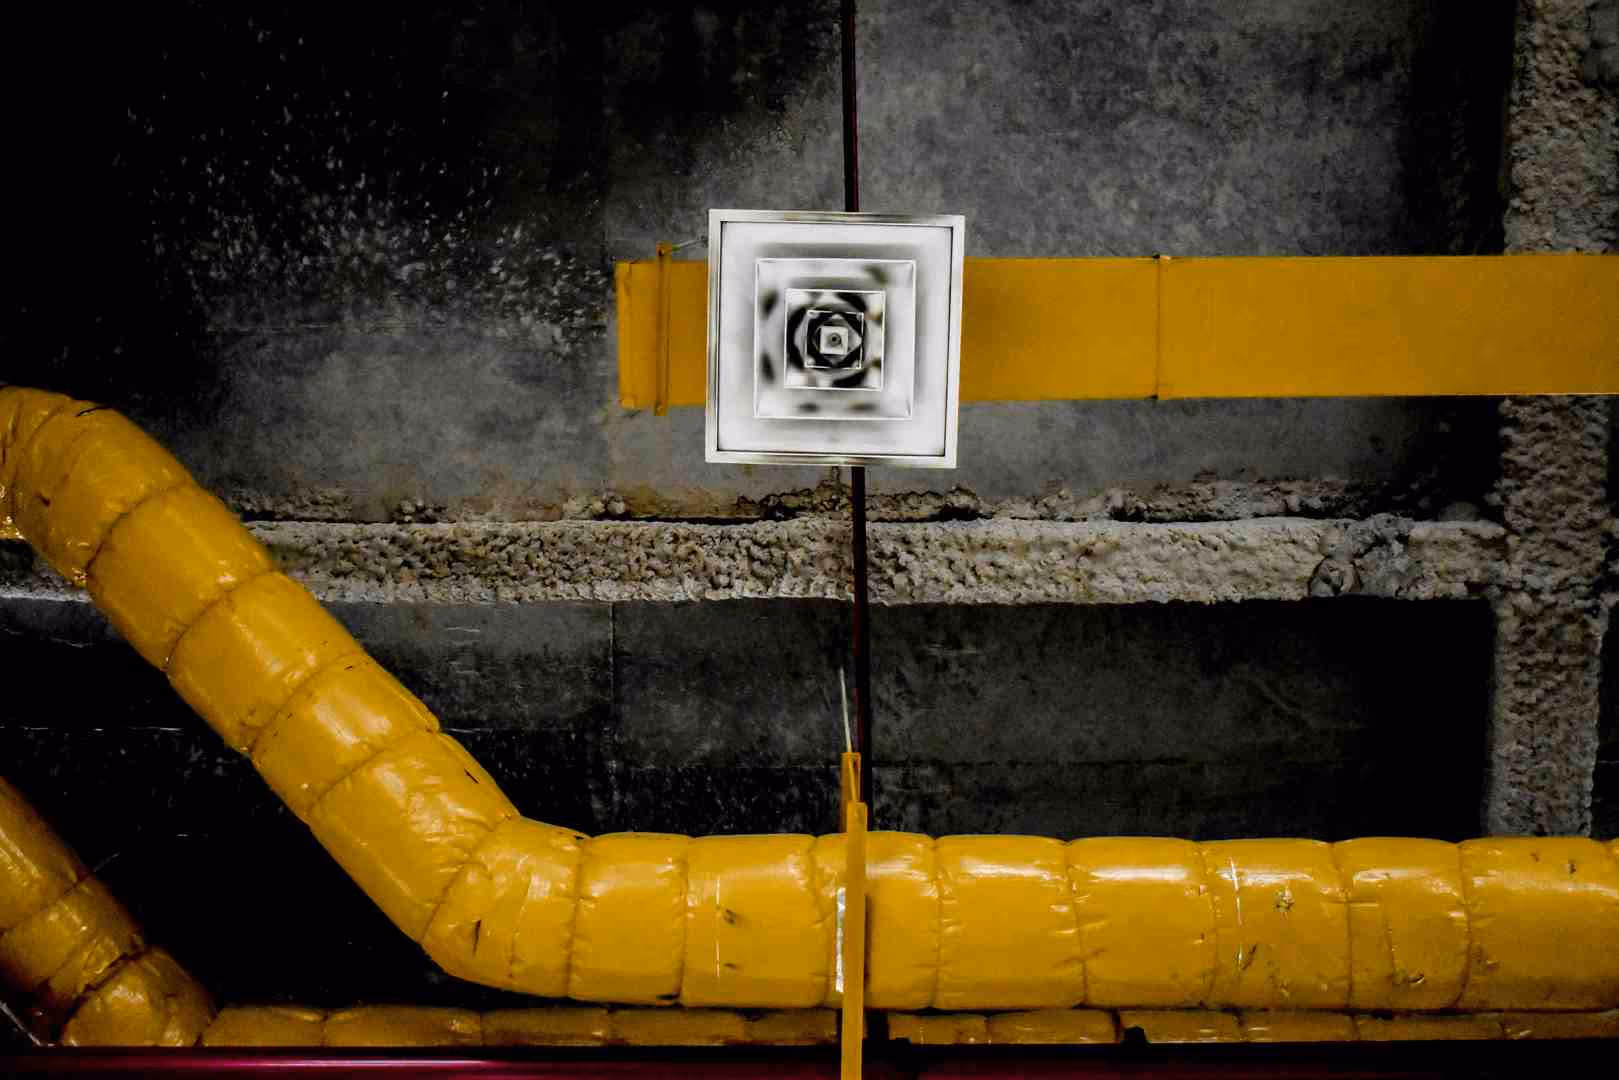
- Ceiling Diffusers: Best for cooling, as they allow cool air to drop and mix efficiently. They can also be subtle and blend into the ceiling.
- Return Air Vents (or Grilles): These vents pull air out of your rooms and back into the HVAC system to be reconditioned. They don't have adjustable louvers and are typically larger than supply vents. Proper return airflow is crucial for system balance and efficiency, helping your system "breathe" effectively. If we add a new supply vent, it's often wise to consider if an additional return vent is needed to maintain this "balance", especially to manage humidity.
Vents also come in various materials, including metal, plastic, and even wood, each offering different aesthetic and durability qualities. When choosing, consider the material that best matches your home's decor and the vent's intended location (e.g., a high-traffic floor might need a more robust metal register).
Determining Optimal Vent Location and Size
Deciding where to place your new AC vent and what size it should be are critical steps. Incorrect placement or sizing can lead to uneven temperatures, wasted energy, and a strained HVAC system.
First, we recommend a "load calculation". This professional assessment helps determine the precise heating and cooling needs of each room, taking into account factors like windows, insulation, and room volume. This is the most accurate way to determine where ductwork and vents should be.
However, for a general guideline, we often work with these rules:
- Room Size: Typically, we'll need one vent for each room that's 100 square feet or less. For larger rooms, two or three vents might be necessary to ensure adequate air distribution.
- Obstruction Clearance: Vents should always be installed at least 12 inches from doors, windows, or any other airflow obstructions like large furniture or curtains. This ensures that the conditioned air can circulate freely and isn't immediately blocked or lost.
- Climate Considerations:
- For optimal cool air circulation, especially in the warm summers we experience in Pittsburgh and surrounding areas like Washington, PA, installing vents near the ceiling is often ideal. Cool air naturally sinks, so placing supply vents high allows it to cascade down and mix effectively.
- Conversely, for heating, floor vents are very effective because warm air rises, distributing heat more evenly from the ground up.
- In humid locations, we might consider installing floor return vents and using ceiling fans to help circulate air and conserve energy. This helps manage moisture and improves comfort without overworking your AC.
To determine the correct size for an AC vent, we measure the opening of the duct itself. The vent dimensions should match the duct's inside edges for a snug fit.
While professionals use precise calculations involving cubic feet per minute (CFM) per vent, a rough estimate can be made by dividing the room's square footage by the number of vents. For more comprehensive insights into maintaining a comfortable home environment, explore our residential hvac solutions.
DIY vs. Hiring a Professional
When considering "AC vent installation", many homeowners in areas like Steubenville, OH, and St. Clairsville, OH, wonder if it's a project they can tackle themselves or if they should call in the pros. Here's a breakdown to help you decide:
| Feature | DIY Installation | Professional Installation |
|---|---|---|
| Cost | Materials typically range from $150 to $300. | Can cost anywhere from $200 to $500, depending on complexity and location. |
| Time | A basic installation can take around 3 hours, assuming no major complications. | Varies based on project scope, but generally efficient due to expertise. |
| Skill Level | Requires basic carpentry skills, understanding of HVAC basics, and confidence with power tools. | Expert knowledge of HVAC systems, ductwork, airflow dynamics, and safety protocols. |
| System Performance | Risk of unbalanced airflow, reduced efficiency, or system strain if not done correctly. | Ensures optimal system balance, efficiency, and longevity, often with warranties. |
When to consider DIY:If you're only replacing an existing vent cover, or adding a very simple new vent in an easily accessible area with minor ductwork modification, and you have the right tools and a good understanding of the process, a DIY approach can save on labor costs. For example, adding a return air vent might cost us approximately $200 in materials if we DIY.
When to hire a professional:We strongly recommend hiring a professional for any project involving connecting to existing ductwork, cutting into main trunk lines, or if you're unsure about your HVAC system's capacity. Errors in measurement, placement, or sealing can significantly impact your entire HVAC system's performance and efficiency.
A professional will perform precise calculations, ensure airtight connections, and properly balance your system. For complex issues or if you're not confident in your abilities, it's always best to call an expert. Our certified technicians at Smart Climate Solutions have the expertise to ensure your ac vent installation is done right the first time. We can also assist with larger projects like ductwork installation contractors for your home.
Gathering Your Tools and Materials
Having everything on hand before we begin makes the installation process smooth and efficient. There's nothing more frustrating than being halfway through a project and realizing we're missing a crucial tool or material!
Essential Tools
For a successful AC vent installation, we'll need more than just a screwdriver. Here's a list of the essential tools we recommend:
- Safety Goggles and Work Gloves: Our number one priority is safety. Protect your eyes from debris and your hands from sharp edges.
- Measuring Tape: For accurate measurements of vent openings, ductwork, and placement.
- Stud Finder: Crucial for locating wall studs, ceiling joists, and existing ductwork to avoid obstructions and ensure structural integrity.
- Drill with Hole Saw Attachment: For cutting clean, circular openings in drywall or wood for your new vent. Choose a hole saw size appropriate for your duct diameter.
- Reciprocating Saw or Drywall Saw: For cutting larger or irregular openings in drywall, or for cutting into existing ductwork (with extreme caution).
- Caulking Gun: To apply duct sealant (mastic) or caulk for airtight seals.
- Shop Vacuum: To clean up debris and dust after cutting, preventing it from entering your duct system.
- Screwdriver (Phillips and Flathead): For securing vent covers and ductwork.
- Utility Knife: For trimming insulation or duct tape.
- Level: To ensure your vent cover is installed straight and looks good.
Necessary Materials
Once we have our tools ready, we'll need the right materials to bring our AC vent installation to life:
- AC Vent Cover (Register or Grille): Choose the type and size that matches your aesthetic and airflow needs. Make sure it fits the duct opening you plan to create.
- Duct Starting Collar (or Take-Off Collar): This piece connects your new branch duct to the main trunk line. It usually has a damper to control airflow.
- Flexible or Rigid Ducting: Depending on the path from the main duct to your new vent location, you'll need either flexible duct (easier to route) or rigid sheet metal duct (more durable and efficient).
- Duct Sealant (Mastic): A crucial material for creating airtight seals at all connections. It's more effective and durable than traditional duct tape.
- Foil-Faced Duct Tape (HVAC-specific): While mastic is preferred for permanent seals, this specialized tape can be used for reinforcement or temporary sealing during the process. Avoid standard cloth duct tape, as it's not designed for HVAC systems.
- Duct Hangers or Straps: To secure the new ductwork, preventing sagging and maintaining proper airflow.
- Screws: Various sizes for securing the starting collar, vent cover, and duct connections.
- Foam Weather Stripping or Caulk: For sealing around the vent cover to prevent air leaks into the wall cavity.
A Step-by-Step Guide to AC Vent Installation
Now that we've planned our project and gathered our supplies, let's walk through the key steps involved in installing a new AC vent into an existing duct system. This guide focuses on adding a branch line for a new vent.
Step 1: Safety and Preparation
Safety is paramount in any home improvement project, especially when working with HVAC systems.
- Turn off HVAC Power: Before touching any ductwork or electrical components, always turn off your entire HVAC system at the main power switch or circuit breaker. This prevents accidental activation and protects us from electrical hazards.
- Wear Safety Gear: Put on your safety goggles and work gloves. Ductwork can have sharp edges, and cutting into walls or ducts will create dust and debris.
- Locate Joists and Ductwork: Use a stud finder to identify wall studs, ceiling joists, or floor joists in the area where you plan to install the vent. We need to ensure our chosen location doesn't interfere with structural elements or hidden pipes/wiring. We'll also trace the path back to the nearest existing supply duct trunk line.
- Mark the Vent Location: Once we've confirmed a clear path, mark the precise spot for the new vent opening on the wall, ceiling, or floor. If using a vent cover template, align and trace it carefully.
Step 2: Creating the Openings
With our location chosen and marked, it's time to make the cuts. Precision here is key for a clean, professional finish and proper airflow.

- Cut the Opening for the Vent: Using your drill with the appropriate hole saw attachment (for circular ducts) or a drywall saw (for rectangular openings), carefully cut the opening for your new vent cover. Take your time to ensure a clean, accurate cut.
- Locate and Mark the Trunk Line: Identify the nearest supply duct trunk line where you'll tap into. Mark the opening for your duct starting collar. This opening should be slightly smaller than the collar's flange to ensure a tight fit. For round collars, use a template or measure carefully. For rectangular, mark the dimensions of the collar's boot.
- Cut the Opening in the Duct: Using a reciprocating saw or specialized duct-cutting tool, carefully cut the opening in the main trunk line. Be mindful of any internal duct lining or insulation. We aim for a clean cut that allows the starting collar to fit snugly.
Step 3: Connecting and Sealing the Ductwork
This is where we connect our new vent to the existing system, ensuring an airtight and efficient flow of conditioned air.
- Install the Starting Collar: Insert the duct starting collar into the opening we just cut in the trunk line. Secure it in place with sheet metal screws, ensuring the damper (if present) is accessible and functional.
- Seal with Mastic: Apply a generous bead of duct sealant (mastic) around the entire flange of the starting collar where it meets the trunk line. Use a brush or gloved hand to spread it evenly, creating an airtight seal. This prevents air leaks, which can significantly reduce HVAC efficiency.
- Attach the New Duct Run: Connect your flexible or rigid ducting to the starting collar. Secure it with screws, clamps, or specialized HVAC zip ties, depending on the duct type.
- Route and Secure the Duct: Route the new duct from the starting collar to the vent opening in your wall, ceiling, or floor. Ensure the duct run is as straight as possible to minimize airflow resistance. Secure the duct with hangers or straps at regular intervals to prevent sagging, especially for flexible ductwork. Proper support maintains the duct's shape and airflow. If you're considering adding dampers to control airflow to specific rooms, you can find more info on how to install dampers in ductwork.
Step 4: Finalizing the Vent Installation
We're almost there! This final step brings our new AC vent installation to a clean, functional conclusion.
- Attach the Duct to the Vent Boot: If your vent cover uses a separate boot (a metal box that transitions from the round duct to the rectangular vent opening), connect the new duct to this boot. Secure with screws and seal all connections with mastic.
- Apply Caulk Around Opening: Before installing the vent cover, apply a uniform bead of acrylic caulk or use foam weather stripping around the edge of the drywall opening. This seals any small gaps between the vent cover and the wall, preventing air leakage into the wall cavity.
- Secure the Vent Cover: Position the internal part of the vent (if it has one) into the opening, followed by the external vent cover. Align it properly and secure it with the provided screws. Ensure it's flush with the surface for a clean look.
- Test the System: Once everything is installed and sealed, turn your HVAC system back on at the circuit breaker. Test the new vent for proper airflow. Feel for any leaks around the vent cover or duct connections. Listen for any whistling or rattling noises, which might indicate loose connections or airflow issues.
Common Challenges and Best Practices
Even with careful planning, we might encounter a few bumps along the road during AC vent installation. Knowing how to troubleshoot and applying best practices will ensure a smooth, efficient system.
Troubleshooting Your AC Vent Installation
- Addressing Poor Airflow: If the new vent is not delivering enough air, first check the damper on the starting collar to ensure it is fully open. Then, inspect all new duct connections for leaks. Poor airflow can also indicate that the existing HVAC system is struggling to support the added demand, especially if a load calculation was not performed. This might mean the system is undersized for the total conditioned space. For a deeper overview of how residential HVAC systems move air, you can review this general guide on HVAC.
- Eliminating Whistling or Rattling Noises: These sounds often point to air leaks, loose connections, or obstructions. Re-check all mastic seals and screw connections along the new duct run. Sometimes, the vent cover itself might be rattling; ensure it is securely fastened and consider adding a thin foam gasket behind it.
- Finding and Sealing Air Leaks: Air leaks are efficiency killers. We can often feel them with our hand, especially near connections. A smoke pencil (a non-toxic smoke generator) can also visualize leaks. Seal all gaps with mastic and reinforce with foil-faced HVAC tape.
- Navigating Unexpected Obstructions: During planning, a stud finder helps, but sometimes pipes or electrical wiring are found. If this happens, do not proceed. Cutting into electrical lines or plumbing can cause serious hazards. It is best to consult a professional to safely reroute the ductwork or the obstruction.
Best Practices for HVAC Efficiency
Proper AC vent installation is not just about getting air to a room; it is about ensuring our entire HVAC system runs as efficiently as possible, saving us money and keeping our homes comfortable.
- The Importance of Airtight Seals with Mastic: We cannot stress this enough. Small air leaks in duct joints can significantly impact HVAC system efficiency and lead to energy wastage. Applying duct sealant (mastic) to all connections is crucial. It prevents conditioned air from escaping into unconditioned spaces and unconditioned air from entering the system.
- Insulating Ductwork in Unconditioned Spaces: If any part of our new duct run passes through an unconditioned attic, crawl space, or even an unheated basement in areas like Burgettstown, PA, and Weirton, WV, it must be insulated. Uninsulated ducts in these areas lead to significant energy loss, making our HVAC system work harder to maintain desired temperatures.
- Balancing Airflow Across the System: Adding a new vent changes the airflow dynamics of our entire HVAC system. A professional can help "balance" the system by adjusting dampers in other ducts to ensure each room receives the appropriate amount of conditioned air. This prevents some rooms from being too hot or too cold and ensures the system operates optimally.
- Regular Vent and Filter Cleaning: Once installed, keeping our vents clean and free of dust and obstructions is important. Regularly cleaning or replacing our HVAC filter is also vital, as a clogged filter restricts airflow and strains the system. For more ways to maximize your home's cooling and heating performance, explore our insights on energy efficient air conditioning systems.
Frequently Asked Questions about AC Vents
We often hear similar questions from homeowners in Pittsburgh, PA, and surrounding communities regarding AC vent installation. Let's address some of the most common ones.
Can I add a new vent to any existing duct?
While it's physically possible to tap into most existing ductwork, it's not always advisable without careful consideration. The main concern is whether your existing HVAC system and ductwork can handle the increased airflow demand. If your system was originally sized for a specific square footage, adding new vents without accounting for the additional load can reduce efficiency and disrupt the balance of your entire system. This means other rooms might get less airflow, or your HVAC unit might struggle to condition the larger space, leading to higher energy bills and reduced comfort. We recommend consulting an HVAC professional to assess your system's capacity and design for proper airflow before proceeding. Adding too many vents or improperly sized ones can lead to an overworked HVAC system and increased energy bills.
Where is the best place to put an AC vent?
The optimal placement for an AC vent largely depends on its purpose (supply or return) and the climate.
- For Cooling (Supply Vents): In our region, where cooling is essential during warm months, placing supply vents high on a wall or on the ceiling is generally best. Cool air naturally sinks, so a high placement allows it to drop and mix more effectively with the warmer air in the room, providing more even cooling.
- For Heating (Supply Vents): If the vent is primarily for heating, floor vents are very effective because warm air naturally rises. This helps distribute heat from the ground up, creating a cozy environment.
- Return Vents: These are typically placed lower on walls or in central locations to efficiently draw air back to the HVAC unit.
- General Rule: Regardless of placement, always ensure vents are at least 12 inches from doors, windows, or any furniture that could obstruct airflow. Unobstructed airflow is crucial for efficiency and comfort.
How many AC vents does a room need?
A common rule of thumb is one supply vent for every 100-150 square feet of floor space. So, a 100 square foot room might need one vent, while a larger room of 200-300 square feet could benefit from two or three. However, this is a general guideline. Factors like the room's ceiling height, the number and size of windows, insulation levels, and the room's specific heating or cooling needs can all influence the ideal number and size of vents. For instance, a room with large, south-facing windows might require more cooling capacity. The most accurate way to determine the precise number and size of vents for optimal comfort and efficiency is through a professional load calculation performed by an HVAC expert. This ensures your system is perfectly matched to your home's unique needs.
Conclusion: Improve Your Home's Airflow and Comfort
Properly installing a new AC vent can significantly improve a room's comfort and your HVAC system's efficiency. From strategically choosing vent types and locations to carefully sealing every connection, each step plays a vital role in ensuring balanced airflow and optimal performance. While this guide provides the steps for a confident DIYer, complex ductwork modifications or system balancing often requires professional expertise to prevent costly mistakes and maintain your HVAC system's longevity.
For homeowners in the Pittsburgh, PA area, including South Hills, Burgettstown, Washington, PA, and even across state lines in Steubenville, OH, St. Clairsville, OH, and Weirton, WV, ensuring the job is done right is our top priority. We believe in empowering you with knowledge, but also in providing expert support when you need it most.
Your Local HVAC Experts
At Smart Climate Solutions, we bring over 20 years of experience to every project. Our certified technicians are dedicated to providing fast, reliable service, ensuring your home's comfort and satisfaction. Whether you're considering a new AC vent installation or need comprehensive HVAC services, we're here to help. Contact us for professional HVAC installation services today, and let us help you breathe easier in your home.


.png)
